

Saturday, 19 April 2014
Monster Hugs 6th Birthday!
A quick post today to show you the birthday card I made for my niece. I had some of these cute monster hugs left over from the valentine promotion and I used the Sale-a-bration banners stamps and punch too.

Sunday, 26 January 2014
Sale-a-Bration Blog Hop
Welcome to my Blog Hop post!

Me and 13 other demonstrators in Julie's Jems Team have each created projects using Sale-a-Bration products and we are sharing them today on our blogs.
All you have to do is hop from one blog to the next using the buttons at the bottom of this post and enjoy the crafty loveliness! (If you've hopped here from Caroline's page, you'll have seen some fabulous creations already!)
Today my project showcases the Sweet Sorbet Designer Series Papers. They are a pack of 12 sheets of 12" by 12" fantastic quality double-sided scrapbook papers - 12 different designs altogether.

I love these papers because they are so fresh and flowery - perfect for spring! I have been using these to create all sorts of things, but I wanted to share some of my favourite projects with you. Firstly my spring flower pot...


I have made these before with different papers back in September. The 3D flower were made using the pansy punch. Each flower is made up of 3 punched pansies, and a piece of wire was pushed through the bottom layer and secured with a little hot glue (a hot glue gun is invaluable for projects like this!). I sponged the edges to give them definition.


I decorated an old coffee tin for the pot. Now I have flowers that will last all year long!

Here are a couple more ideas...


The pack of papers is worth £9.95 and are not for sale, but you can get them for FREE when you spend £45 until the end of March. They are just one of the many products you can choose for every £45 spend including stamp sets, a punch, card kits, and even digital sets. Keep hopping to see more ideas!!
I hope you like my project - please leave a comment before you hop onto to the next blog, which is Karen's!
Other Jems taking part in the Blog Hop:
Karyn Davies - KD Crafts
Debbi Taylor - Bee Crafty and Stamp
Rebekah Cornford - Crafting Becky
Julie McCartney - Crafty Angel Wings
Amanda Bates - The Craft Spa
Julie Kettlewell - Julie's Japes
Allie Jolliffe - Jolli Crafts
Sharon Glynn - Happy Crafter
Angie Hutton - Feathertassel
Kate Martin - Krafts by Kate Martin
Liz Youd - Stampin and Creatin
Fiona Cullen - The Create Escape
Caroline Lovett - Caroline's Crafts & More
Kylie Henshaw - Hello Stamper - YOU ARE HERE!
Me and 13 other demonstrators in Julie's Jems Team have each created projects using Sale-a-Bration products and we are sharing them today on our blogs.
All you have to do is hop from one blog to the next using the buttons at the bottom of this post and enjoy the crafty loveliness! (If you've hopped here from Caroline's page, you'll have seen some fabulous creations already!)
Today my project showcases the Sweet Sorbet Designer Series Papers. They are a pack of 12 sheets of 12" by 12" fantastic quality double-sided scrapbook papers - 12 different designs altogether.
I have made these before with different papers back in September. The 3D flower were made using the pansy punch. Each flower is made up of 3 punched pansies, and a piece of wire was pushed through the bottom layer and secured with a little hot glue (a hot glue gun is invaluable for projects like this!). I sponged the edges to give them definition.
I decorated an old coffee tin for the pot. Now I have flowers that will last all year long!
Here are a couple more ideas...
I covered a wooden 'love' decoration with the papers (my favourite design in the pack!), and also a money tin. I added some chalkboard paper cut with the labels die so people can write what they are saving for!
The pack of papers is worth £9.95 and are not for sale, but you can get them for FREE when you spend £45 until the end of March. They are just one of the many products you can choose for every £45 spend including stamp sets, a punch, card kits, and even digital sets. Keep hopping to see more ideas!!
I hope you like my project - please leave a comment before you hop onto to the next blog, which is Karen's!
 |
| Go back to Caroline's Blog |
 |
| Carry on to Karen's Blog |
Other Jems taking part in the Blog Hop:
Karyn Davies - KD Crafts
Debbi Taylor - Bee Crafty and Stamp
Rebekah Cornford - Crafting Becky
Julie McCartney - Crafty Angel Wings
Amanda Bates - The Craft Spa
Julie Kettlewell - Julie's Japes
Allie Jolliffe - Jolli Crafts
Sharon Glynn - Happy Crafter
Angie Hutton - Feathertassel
Kate Martin - Krafts by Kate Martin
Liz Youd - Stampin and Creatin
Fiona Cullen - The Create Escape
Caroline Lovett - Caroline's Crafts & More
Kylie Henshaw - Hello Stamper - YOU ARE HERE!
Saturday, 25 January 2014
Spring swaps
Ooops - it's been a while since my last post. Christmas and other things have got in the way of my aim to blog more regularly! However, I'm determined to kickstart my new crafting year with lots of interesting projects and exciting new Stampin' Up! products!
Today was our team's Quarterly Training Day in Pudsey, and as always there was plenty of crafting and inspiration, a raffle, great food and fab company! And as usual we all made swaps and spent the first few minutes exchanging projects with one another. I got some really lovely cards and gifts in exchange for mine, which were...

... treat boxes made using the envelope punchboard, and decorated with Sale-a-Bration products (more about that in a minute!).
I followed a video tutorial by an American demonstrator Jen Arkfeld to learn how to make the boxes. Click here for the video. One you know the measurements they are very straightforward to make and I managed to cut, score, punch and assemble 20 of these in less than an hour.

To decorate I added some of the Sweet Sorbet Designer Series Paper - one of the free products you can choose with every £45 spend during Sale-a-Bration. The banner stamps and matching punch are also free items and I used these to make a colourful topper for the box.
So Sale-a-Bration - this is Stampin' Up!'s biggest annual promotion and it begins on Tuesday 1st February, lasting right up to 31st March. Between these dates there are brilliant incentives for customers, party hosts and their guests, and new demonstrators who sign up during the promotion. I'll add all the details to my blog on Tuesday!
Please come back here at 10am tomorrow to begin a Sale-a-Bration Blog Hop and you'll see a whole range of gorgeous creations from members of our team using the new freebie items!

Goodnight
Kylie x
Today was our team's Quarterly Training Day in Pudsey, and as always there was plenty of crafting and inspiration, a raffle, great food and fab company! And as usual we all made swaps and spent the first few minutes exchanging projects with one another. I got some really lovely cards and gifts in exchange for mine, which were...
... treat boxes made using the envelope punchboard, and decorated with Sale-a-Bration products (more about that in a minute!).
I followed a video tutorial by an American demonstrator Jen Arkfeld to learn how to make the boxes. Click here for the video. One you know the measurements they are very straightforward to make and I managed to cut, score, punch and assemble 20 of these in less than an hour.
So Sale-a-Bration - this is Stampin' Up!'s biggest annual promotion and it begins on Tuesday 1st February, lasting right up to 31st March. Between these dates there are brilliant incentives for customers, party hosts and their guests, and new demonstrators who sign up during the promotion. I'll add all the details to my blog on Tuesday!
Please come back here at 10am tomorrow to begin a Sale-a-Bration Blog Hop and you'll see a whole range of gorgeous creations from members of our team using the new freebie items!
Goodnight
Kylie x
Sunday, 1 December 2013
Convention Part 1 - Highlights
Last weekend was Stampin' Up!s 2013 European Convention, this year held in Manchester, and attended by nearly 800 demonstrators. You might be wondering what this convention lark is all about!
Well, all demonstrators across Europe are invited to attend this annual event to celebrate their accomplishments, learn new ideas and innovative crafting techniques, see and try new products and share projects and inspiration with each other. It's a craft-packed few days with lots of prizes and freebies, a real party atmosphere and a great chance to hang out with demonstrator friends (of which I am very lucky to have many!).

As usual I have come back all motivated and buzzing with ideas and inspiration, and I even have some goals for next year!
I'd like to share some of what I saw and learnt at this year's convention, but for today here are some pictures and highlights of the 2 days!


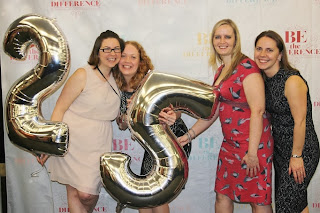
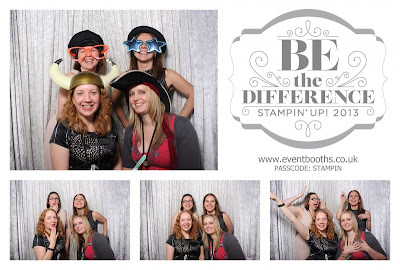
I'm already looking forward to next year's convention which will be in Brussels!
Kylie x
Well, all demonstrators across Europe are invited to attend this annual event to celebrate their accomplishments, learn new ideas and innovative crafting techniques, see and try new products and share projects and inspiration with each other. It's a craft-packed few days with lots of prizes and freebies, a real party atmosphere and a great chance to hang out with demonstrator friends (of which I am very lucky to have many!).

As usual I have come back all motivated and buzzing with ideas and inspiration, and I even have some goals for next year!
I'd like to share some of what I saw and learnt at this year's convention, but for today here are some pictures and highlights of the 2 days!

Julie made everyone in her team a personalised bag tag with sparkly initial keyring!


This year's convention bags were rucksacks with lots of useful pockets and came filled with three stamp sets, make and take kits and a pen!

Me and my upline Alex ready for the opening session!

Me and Fiona enjoying a cupcake in the Recognition Booth - our little treat for both having achieved something this year - me for promoting to Bronze 3 and Fiona for achieving her Stampin' Start award!

Getting caught up in the atmosphere at the beginning of day 2.

The display boards were fantastic. And I spotted some of my projects on this one!

We all got dressed up for the awards night and had fun at the after-party!

I'm already looking forward to next year's convention which will be in Brussels!
Kylie x
Monday, 25 November 2013
Christmas Card Stamp-a-Stack
Wow- I can't believe it's been so long since my last post! I've been super busy, with classes and Christmas projects, as well as preparing for and attending my second Stampin' Up! Convention which was this weekend just gone. More on that later this week (there's so much to share!!).
But this evening I'm going to show you the projects we made at my recent Christmas Stamp-a-Stack Card Class. Everyone made 10 cards, 2 each of 5 designs which all used different products and techniques.


This last card allowed the ladies to enjoy a bit of therapeutic colouring-in. We used the Color Me Christmas stamp set and got creative adding colour with the aqua painters and marker pens.
This was the first time I had tried a stamp-a-stack style class and I think it worked really well, so look out for more in the new year!
Kylie x
But this evening I'm going to show you the projects we made at my recent Christmas Stamp-a-Stack Card Class. Everyone made 10 cards, 2 each of 5 designs which all used different products and techniques.

The JOY card used the Big Shot and the Typeset alphabet dies to cut out the letters from Season of Style DSP.

We embossed the snowflakes using the Northern Flurries embossing folder and the Big Shot. White ink was sponged onto the snowflakes and the edges of the card and it was then spritzed with a little early espresso ink mixed with alcohol inside the Stampin Spritzer.

Another snowflake card! This one was stamped with the Festive Flurries stamp set! And the gorgeous sentiment is part of the Christmas Messages stamp set.


Something a bit different - a Christmas card in In-Colours. I did a similar card in my September class with butterflies. The Christmas tree punch is part of a set of three called Merry Minis.


This last card allowed the ladies to enjoy a bit of therapeutic colouring-in. We used the Color Me Christmas stamp set and got creative adding colour with the aqua painters and marker pens.
This was the first time I had tried a stamp-a-stack style class and I think it worked really well, so look out for more in the new year!
Kylie x
Thursday, 10 October 2013
Monthly card class - October
Tonight was my monthly card class, and this time I did a mixture of Christmas and non-Christmas projects!
The first card uses the Starburst/Sunburst technique - a great way of using up scraps of patterned papers. These papers are the Season of Style Designer Series from the Autumn/Winter catalogue.

The second card features the 'For the Birds' stamp set. The ladies had free choice of all the stamps in the set, but they all chose the Christmas bird!


The next card really got us into the festive spirit!! This uses the Festive Flurries stamp set which I have fallen in love with and can't stop using! We heat embossed some of the snowflakes with silver embossing powder to make them shine, and the rhinestones in the centres add a bit more sparkle!


Lastly we made a love bird card and I let the ladies choose their sentiment. I thought this would be great for an Anniversary, Engagement, Wedding or just for someone you love!

The birds are punched out from the Natural Composition Speciality papers.

This month's cake was Delia's spiced apple muffin cake with pecan streusal topping, warm from the oven and made with apples from the tree in my garden!
Kylie x
The first card uses the Starburst/Sunburst technique - a great way of using up scraps of patterned papers. These papers are the Season of Style Designer Series from the Autumn/Winter catalogue.

The second card features the 'For the Birds' stamp set. The ladies had free choice of all the stamps in the set, but they all chose the Christmas bird!

These were stamped with black stazon ink (a permanent ink) onto watercolour card, and then coloured using the aqua pens and ink.

The next card really got us into the festive spirit!! This uses the Festive Flurries stamp set which I have fallen in love with and can't stop using! We heat embossed some of the snowflakes with silver embossing powder to make them shine, and the rhinestones in the centres add a bit more sparkle!


Lastly we made a love bird card and I let the ladies choose their sentiment. I thought this would be great for an Anniversary, Engagement, Wedding or just for someone you love!

The birds are punched out from the Natural Composition Speciality papers.

This month's cake was Delia's spiced apple muffin cake with pecan streusal topping, warm from the oven and made with apples from the tree in my garden!
Kylie x
Wednesday, 9 October 2013
A card for Ollie
Here's a recent card I made for my nephew's birthday. I really love the papers which are from the Birthday Basics designer series pack. I know these are going to get used a lot, especially for kids birthdays!!


I added a little scrap of paper inside the card.


Kylie x

Ollie's name was stamped with the Noteable Alphabet stamps and the 3 was cut using the Typeset Number dies on my Big Shot.

I added a little scrap of paper inside the card.

I also used the simply scored tool to create an embossed zig-zag effect.

Kylie x
Subscribe to:
Posts (Atom)